


Tip 01
Low-Light, No Problem
An evening in the city with friends. A candlelit dinner. The view from your campsite as night falls. Photographing light in these situations is easier said than done, but taking photos with your iPhone in low-light scenarios is simpler than you might think with Night Mode. This feature will automatically select the best exposure period based on current lighting to prevent dark, fuzzy photos. Exposure is essentially the amount of light that reaches your camera sensor. By ending the time duration of a shot, more light is taken in — leaving you with detailed and clear night photos.
How to use Night Mode: The iPhone 11 and iPhone 11 Pro will turn on Night Mode automatically when your camera recognizes a low-light situation. You will see a moon icon at the top left of your screen turn yellow when the feature is active. The corresponding number next to the icon indicates how long the shot will take. Be sure to hold your iPhone steady during the duration of the capture for the best results. In general, the default settings should do the trick, but feel free to tap the icon to adjust the exposure! Use the slider that pops up to extend the capture time.
Practice on: iPhone 11, or any newer version of iPhone
Tip 02
Record With Ease
Whether it be your pup rolling (adorably) around on the floor or a spontaneous bit of laughter with friends, sometimes the most video-worthy moments happen fast — too fast. Capture the memory quickly with this iPhone photo effect: QuickTake. This new feature allows you to record videos immediately without switching out of photo mode.
How to use QuickTake: Similar to how you would take a video for Instagram Stories or Snapchat — simply open the camera app and press hold on the shutter button to record. Release the button to stop recording. To keep the video recording without holding the button, slide the button to the right, then release it over the circle that appears. While the video is locked, you can tap the new shutter button on the right to take still photos while filming (the best of both worlds!). Once you're done filming, press the middle record button, and you'll have the entire video plus your favorite still shots filling up your camera roll.
Practice on: iPhone 11, or any newer version of iPhone
Tip 03
Frame Your Shot, Confidently
When it comes to iPhone 11 photography tips, one of our favorites is to utilize the three camera lenses: Ultra Wide (0.5x), Wide (1x), and Telephoto (2x). Switch easily between these camera views by tapping the numbers at the bottom of your frame. From group shots to nature views and photos of architecture, these different lens systems will help zoom in and out to frame your shot just right.
How to frame: When using the Wide (1x) camera, the viewfinder will give you an idea of what the Ultra Wide (0.5x) camera would capture, so you can switch cameras if you like what you see. Similarly, if you have the iPhone 11 Pro, you can see the Wide (1x) view outside the Telephoto (2x) camera frame.
Practice on: iPhone 11 Pro, or any newer version of iPhone. Or practice with the Wide and Ultra Wide cameras on iPhone 11.
Tip 04
Re-Frame After The Fact
Yes, we're serious. It's like magic. This iPhone photo trick comes to the rescue when you regretfully realize you cut an uncle or cousin out of the group photo frame (we've all been there...). With the iPhone 11, you can zoom out to the Ultra Wide (0.5x) view after you've taken your photo.
How to re-frame: To use this feature, first go to your settings app, select camera, and turn on "Photo Capture Outside the Frame." Take a photo, and if you see a square-star icon under "edit," you've done the setup right (pat yourself on the back!). You can now take advantage of this iPhone photo trick when editing pictures in the photos app. The easiest way to expand the photo after the fact is to hit edit, select the crop tool, and then pinch in to zoom out.
Practice on: iPhone 11, or any newer version of iPhone
Tip 05
Go Live
Capture photos that come alive when you look back through your camera roll. With Live photos, your phone records 1.5 seconds before and after you press the shutter — taking in a more full moment, with movement and sound.
How to take a Live photo: The Live photo feature is on by default. However, you can turn it on and off by tapping the burst icon on the tip right of your screen (if there's a line through the burst, it is turned off). To see the Live photos in action — go to your photos, hold down on the image, and watch the moment come alive.
Practice on: iPhone 9, or any newer version of iPhone
Note: We love Live photos, but be sure to check before you go to print your photos! Our editor cannot upload Live photos as the files are .heic rather than .jpg. Not to fear, you can easily convert the .heic file to .jpg, or you can turn Live off to snap a few still shots. To convert the files in Preview on Mac, go to File > Export. In the Format section, select JPEG or PNG and hit save.
Tip 06
Time Travel With Timelapse
For a video sure to take everyone's breath away, say hello to Timelapse. This stunning technique will capture film frames at a slower rate than the rate used to view the sequence. From cities transitioning into the night to star-filled skies and clouds in motion, there are many occasions for breaking out your Timelapse camera effect — just be prepared to hold that camera still for about 30 minutes (cue the mounts and tripods!).
How to create a Timelapse video: It's easy — select the Timelapse shooting mode on your camera by swiping right to select. Press the red button to start the recording process and press it again to end. Depending on how fast your subjects in view are moving, you will want to film anywhere from 30 minutes to a couple of hours. Psst... there are a few Timelapse calculators on the internet that can help you estimate how long to set up for!
Practice on: iPhone 8, or any newer version of iPhone
Tip 07
Take It Slow
Let your best moments last a little longer with Slow-Motion videos. This feature will record your video as normal, but you'll see a slo-mo effect when played back. Slow-Motion videos are fun and playful, so go ahead and capture your cat making the leap from counter to couch and create easy-to-return-to comic relief. New to the iPhone 11 are "Slofies," meaning you can now take a Slow-Motion video with the user-facing camera.
How to use Slo-Mo: Similar to Timelapse, simply swipe right over to select "Slo-Mo" and hit the red button to record. When you play your video back, you'll see the video has reduced in speed in areas. To edit the section that is slowed, hit "edit" and drag the thin white start and stop points wherever you'd like in the timeline.
Practice on: iPhone 5s, or any newer version of iPhone
Tip 08
Portraits, Made Easy
Here's an iPhone camera tip we love: use Portrait Mode to photograph people! By now, we’ve all seen those perfectly in-focus images that are taken on (drumroll)....an iPhone. Portrait Mode creates a depth-of-field effect where your subject remains sharp while the background is blurred. Using this effect, there are also various studio-quality lighting effects to choose from to make your photos even more stunning. With the ability to create depth and highlight a subject, Portrait Mode has quickly become one of our favorite features that will have people asking if your photo was taken on a DSLR.
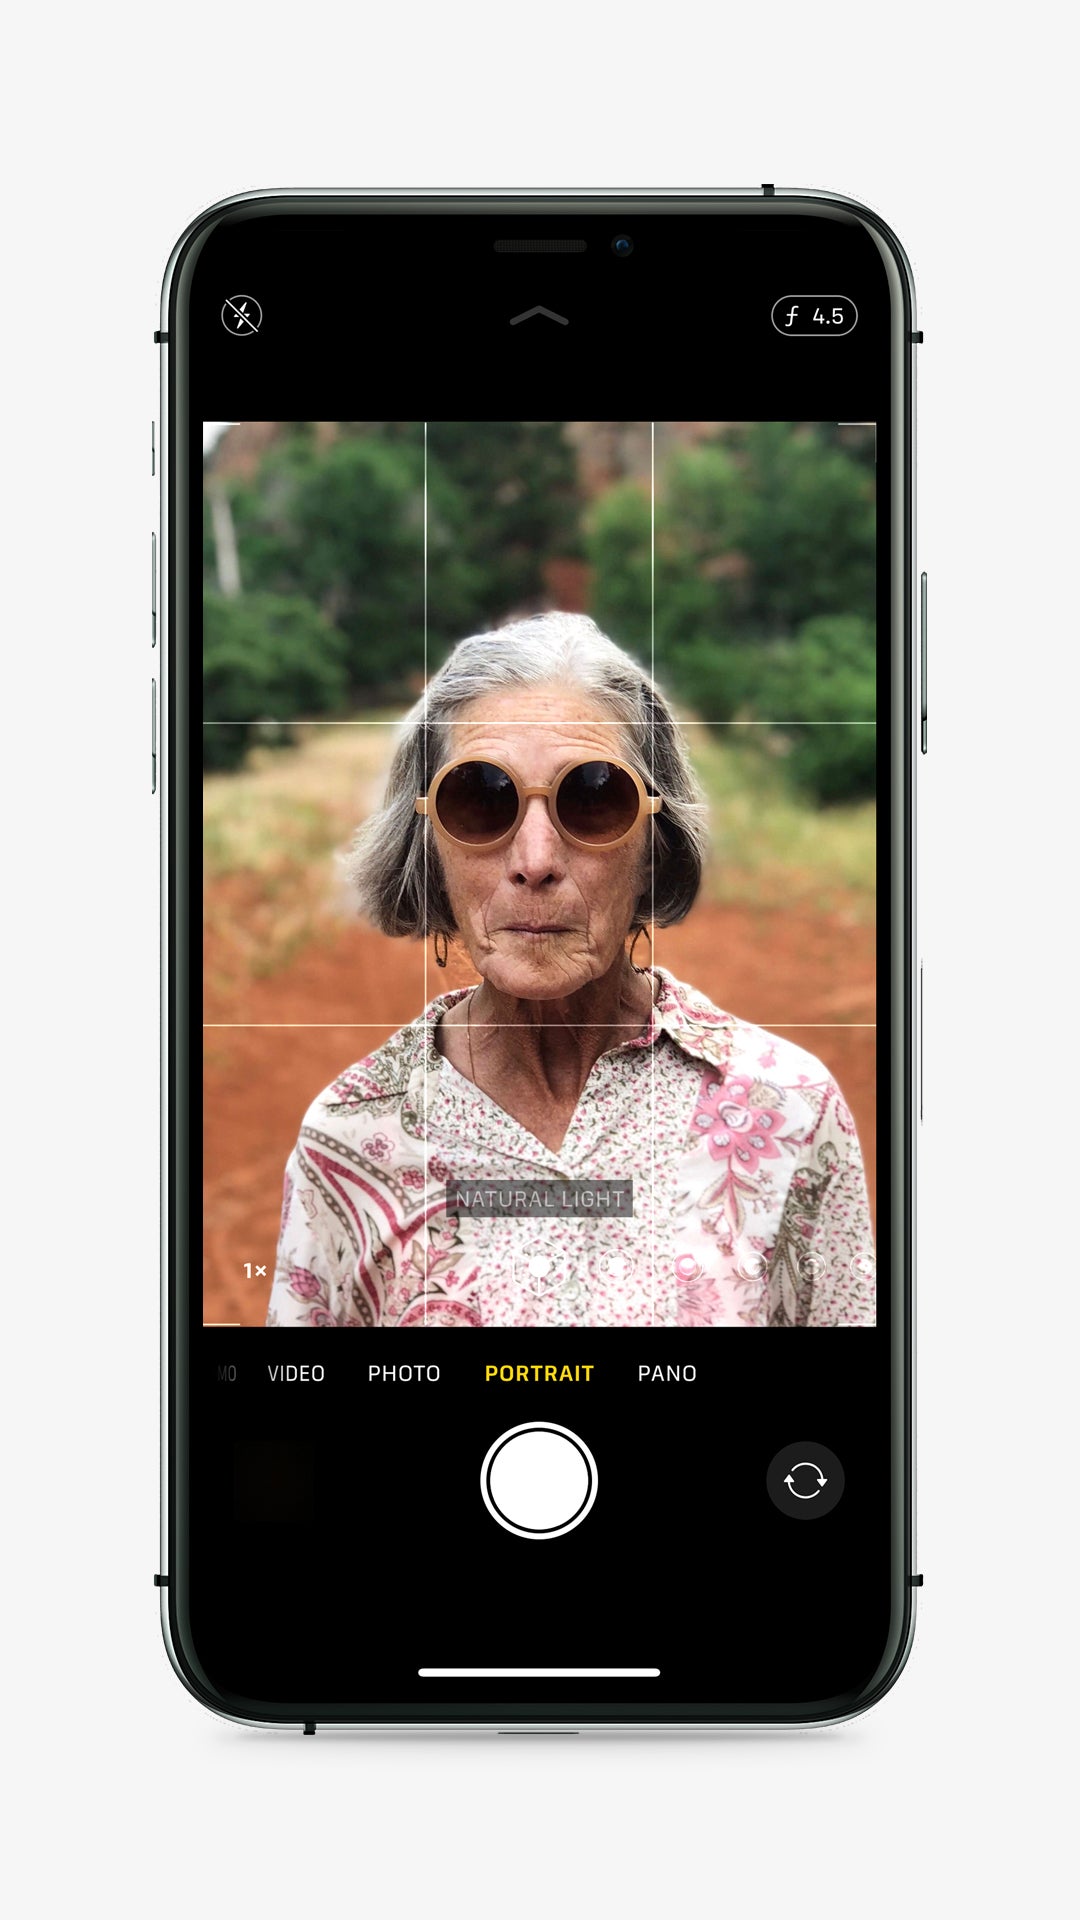
How to use Portrait Mode: Portrait Mode can be found by swiping left to select "Portrait." There you can select your lighting effect (we love "Natural Light"). Your phone will even cue you to move farther away from your subject or get closer, so follow its lead and press the shutter with confidence. Best part? You can edit the lighting effect chosen after the fact by hitting edit and selecting a new one.
Practice on: iPhone 7 Plus, or any newer version of iPhone (psst: the lighting effects are available on iPhone X, iPhone 8 Plus, and later)
Tip 09
Take In The Full View
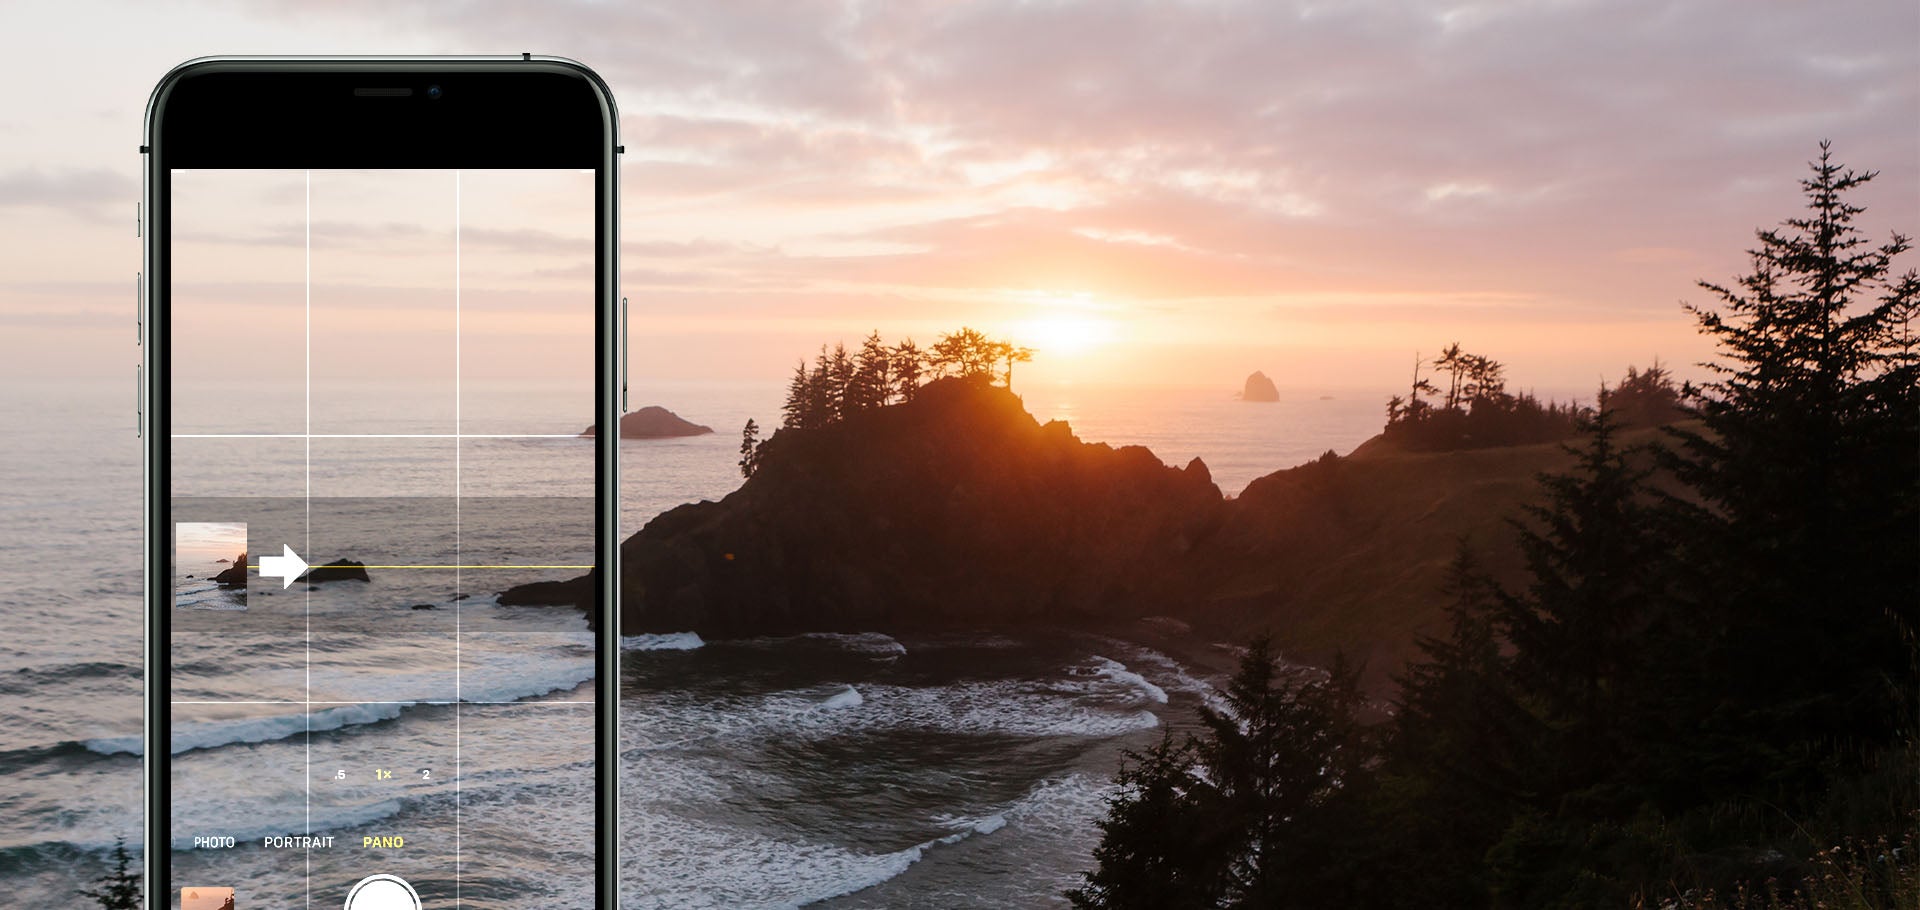
For the wide-open views that you'll want to return to — capture a full landscape in a single shot with the Panoramic effect. Panoramas are great to encapsulate a scene that is too wide (or too tall) to fit inside the frame of a conventional landscape or portrait layout. Use this feature for landscape photography, beaches, large groups of family and friends, etc. Pro-tip: Panoramic photos don't have to be horizontal. Create a sense of drama or scale photographing a building or waterfall as a vertical pano on iPhone.
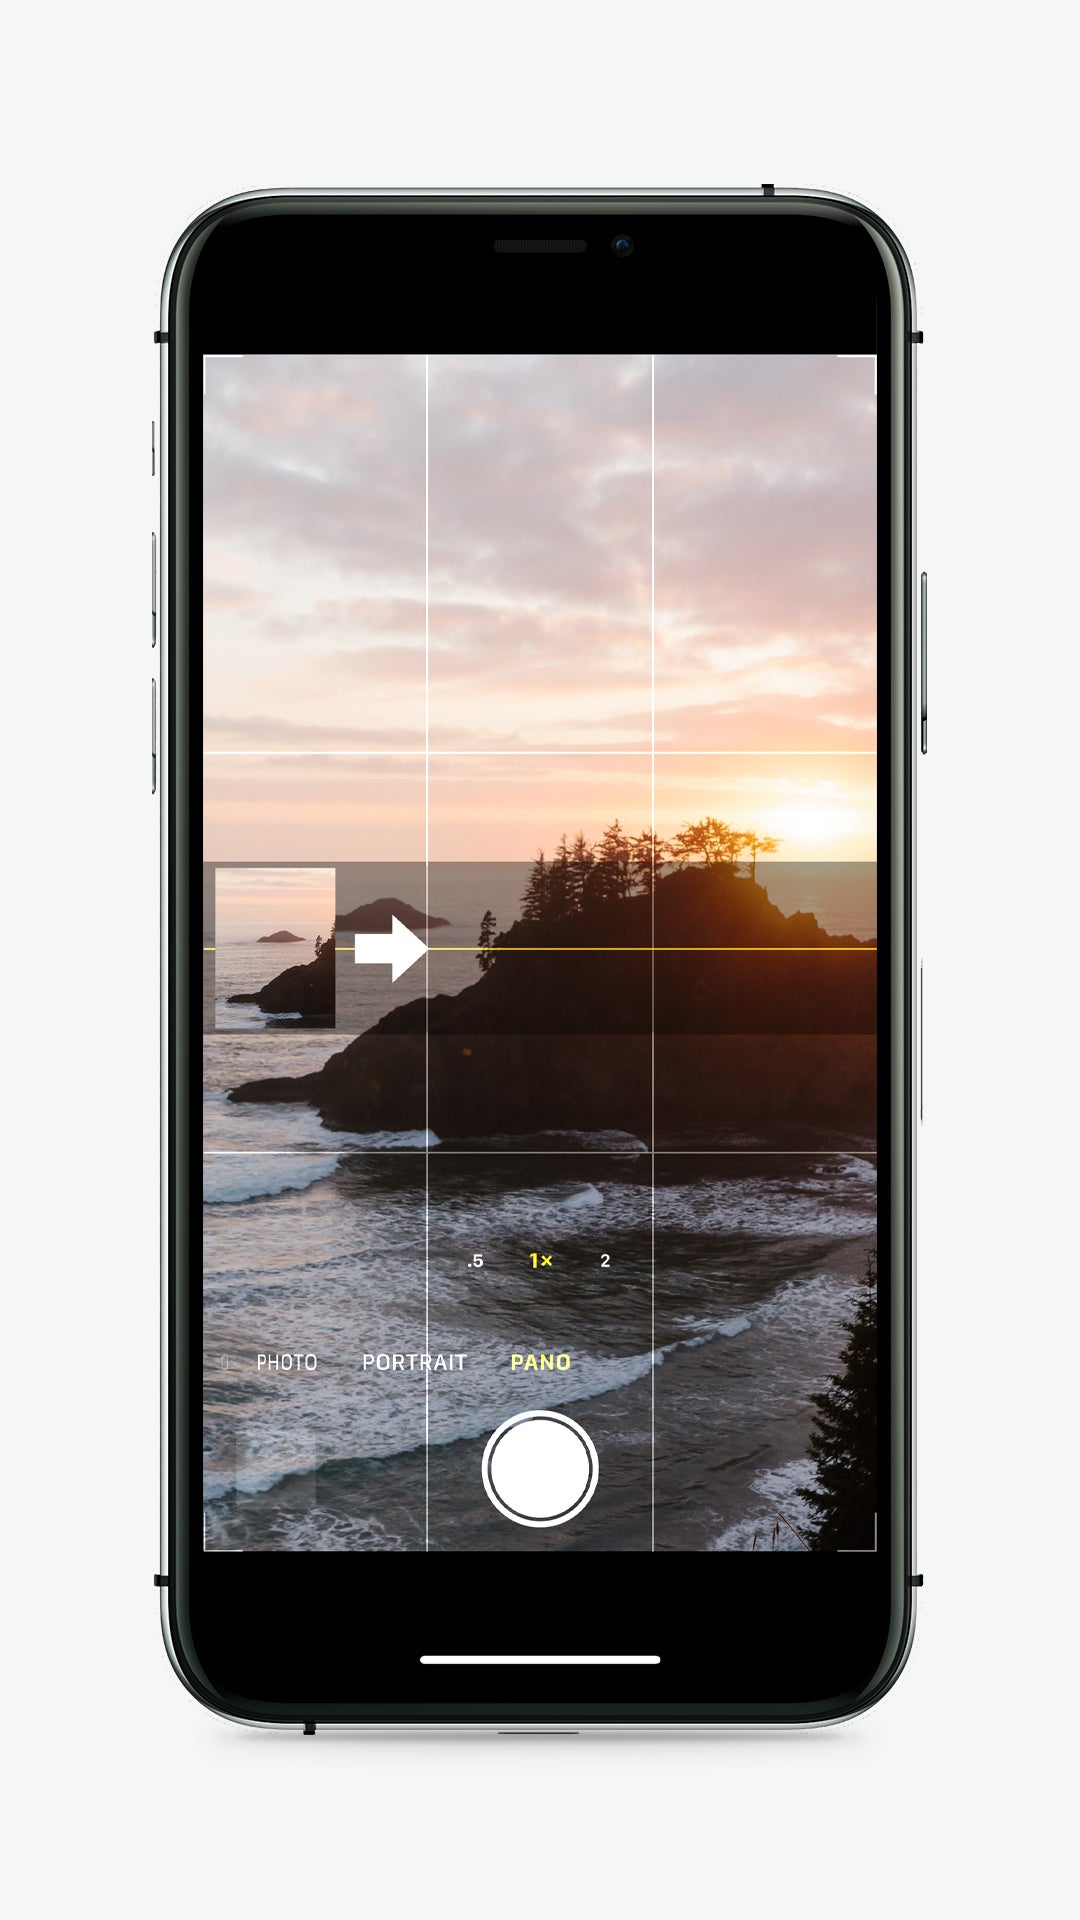
How to take 360 photos on iPhone: In the camera app, swipe left over to "Pano" to select this mode. Press the shutter button and pan your camera from the start to the end of the scene. You can tap the arrow to choose panning left to right or right to left. Be sure to hold your camera steady and heed the "slow down" or "move up/down" notices that pop up as you go. To create a vertical pano, simply rotate your iPhone and pan low to high or high to low.
Tip 10
Catch Movement Through Burst Mode
If you see the beginnings of movement you know you need to capture, take a burst of photos. You’ll get every step in the sequence, which will lead to a handful of action shots to choose from. Head to your camera roll and click on what seems like just one photo. The “select” function will let you scroll through and pick your favorites — keep in mind that sometimes blurry is beautiful and the best type of movement is the one that’s most natural.
How to take a burst of photos: If you are new to iPhone 11, you may be wondering "where did Burst photos go on my iPhone?" The act of holding the shutter button now triggers QuickTake instead (remember that from above?). Not to fear, Burst Mode is still possible — it's just hidden. To use this mode, swipe left on the shutter button, hold to shoot, and release when you're done. Be sure you do this swipe left fast! If you hold too long, you'll notice you've activated QuickTake instead.
Practice on: iPhone 5s, or any newer version of iPhone (the change in accessing Burst Mode applies to iPhone 11 and later)