


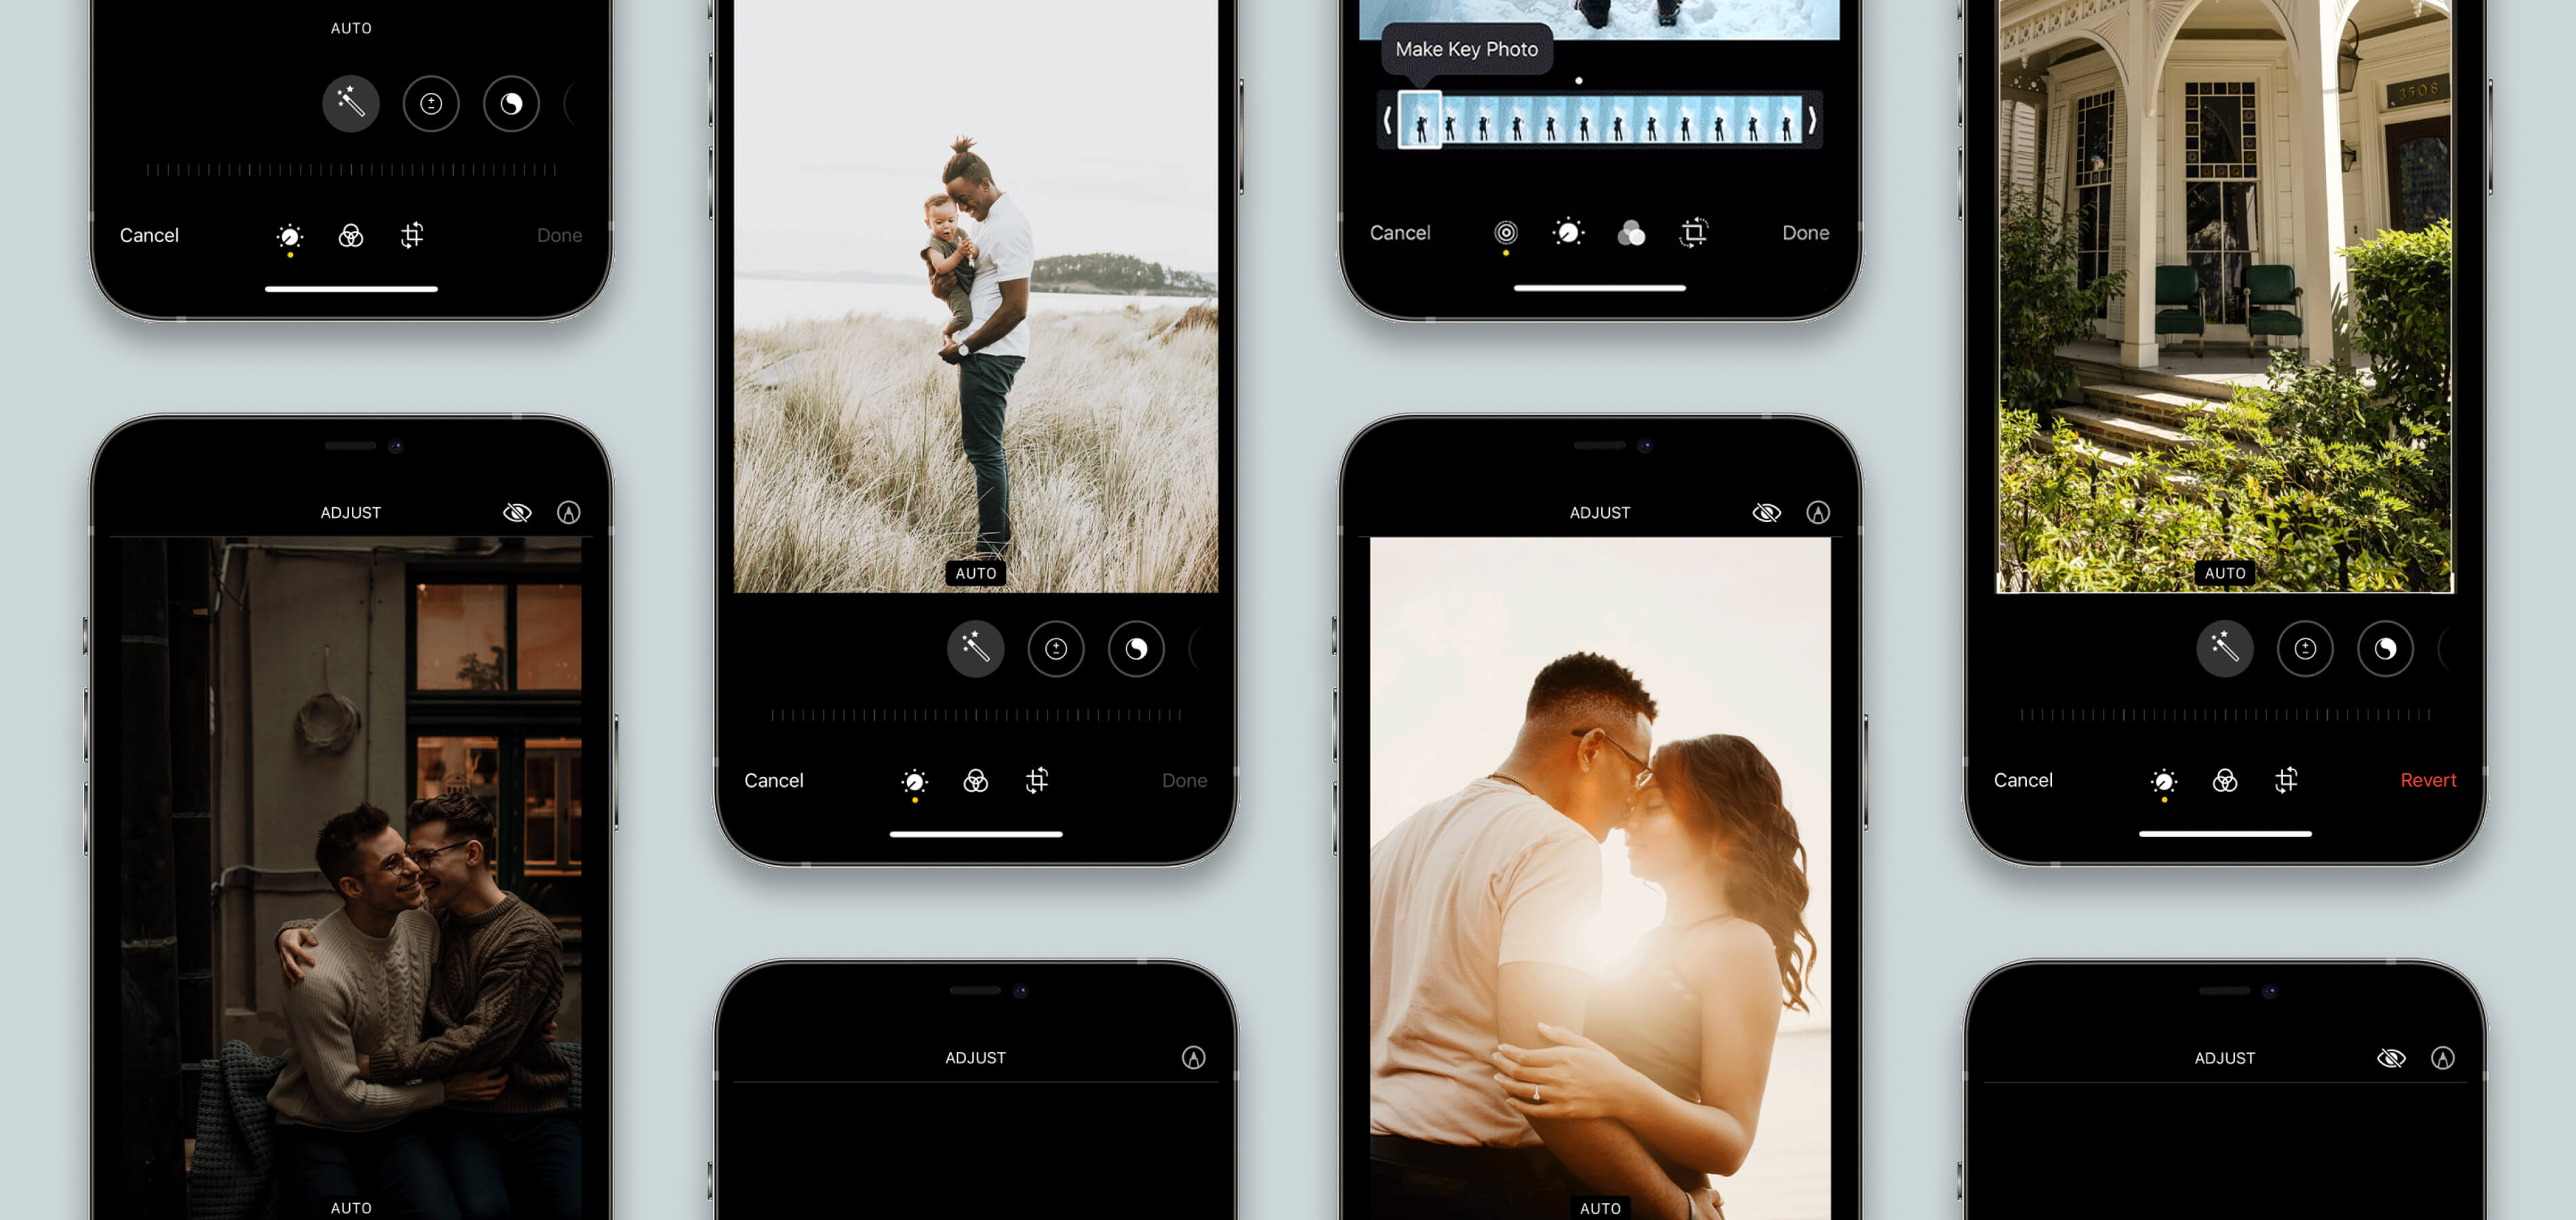
Tip 01
Need to zoom in or adjust positioning?
Oftentimes, we take a photo in a meaningful moment where everyone looks great, but the surrounding elements of the photo take away from what would have otherwise been the perfect snap. Or, the main subject of the photo is positioned too far in any one direction, making the image feel out of balance. Luckily, it's as easy as cropping in to cut the excess out and position the subject of focus exactly where you want it. It might seem simple (because it is!), but Crop is our favorite editing tool — we use it on almost every photo we print!
Just follow these steps...
In your camera roll, open the photo you want to print and tap the "Edit" button. By tapping the far right icon of the three that appear at the bottom of your screen, you'll open the Crop tool. Drag the corners of the image in any direction to crop in on the photo and eliminate the portions that you don't like. Cropping in more on any one side can help to center the subject of the image or position it just about anywhere.
Tip 02
Photo off-kilter?
It's only natural that some of the photos we take will be a little off-kilter, even with our best attempts to hold the camera straight. To straighten things out, we use a separate function of the Crop tool from above to rotate the image just a tad and level things out again. The key to getting things straight is to look for horizon lines within the image that can guide you, whether they be background lines within a landscape image or the edges of walls in a photo created indoors.
Just follow these steps...
Open the Straighten tool by entering the Crop function as you did above. Once in the tool, you should see a series of vertical dashes on a horizontal line at the bottom of the screen. By simply dragging that line to the left or right, you can rotate the image in either direction to straighten it out in accordance with the horizon lines in the image.
Tip 03
Too dark or bright?
You don't have to be a pro to know how to fix lighting in photos. Whether it's that birthday photo taken in a dark restaurant or happy hiking scenes captured in the harsh light of high noon, adjusting Exposure after the snap can turn photos you don't feel great about into those you can't wait to print. Simply bump up the Exposure when things feel a little too dark or tame the lighting by turning it down. Just remember: adjusting too far in either direction will ultimately make your photo look unnatural.

Just follow these steps...
Once you've tapped the Edit button on the photo you'd like to adjust, locate the icons directly beneath the photo and select the Exposure icon (marked by a "+" and "-" inside of a circle). Move the cursor to the right side of the scale to increase Exposure on dark images, or move it to the left to soften overexposed images.
Tip 04
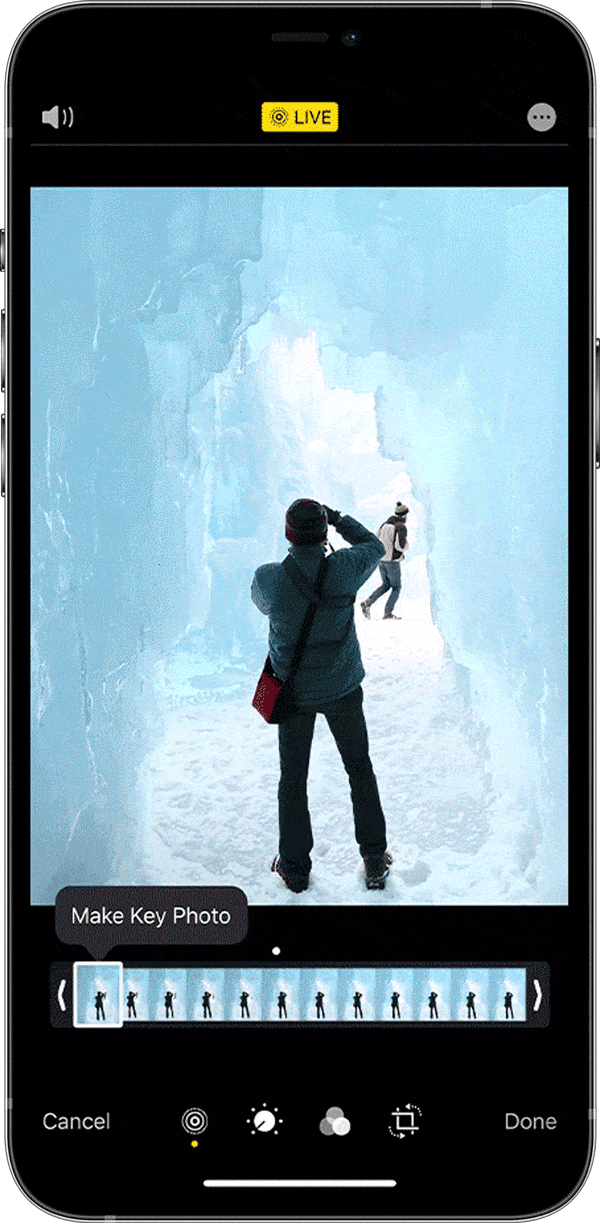
Looking for a better frame?
We're big fans of Live Photos on iPhone. In fact, our Lead Photographer takes almost all of her photos using this function. Here's why: with live photos, you'll have several frames to choose from. So if you catch someone with their eyes closed, or someone you don't know walking out of the frame, you can easily solve the problem by selecting a new key frame. In fact, we'd recommend looking back through the frames on all of your Live Photos. You know the frame you want better than your iPhone does!

Just follow these steps...
Make sure the photo you want to edit is a Live Photo by tapping on it in the Photos library and looking to the top-left directly above the image. You should see the "Live" marker. Now tap "Edit" and select the icon farthest to the left of the four at the very bottom-center of the screen (three concentric circles). All of the available frames will now show up directly below the image, and you can view any of them by tapping on the frame. Once you've found a favorite, tap the "Make Key Photo" button and hit "Done."
Tip 05
Colors not quite right?
Depending on the time of day, type of bulbs in the room, and other factors, lighting can give your photo a hue that distorts the true colors of the image. A common example is a photo taken under overly yellow indoor bulbs, or fluorescent lighting that takes the glow out of everyone's face. In either case, it makes the image feel artificial, but the Warmth tool can go a long way in making things feel a little more natural. The purpose of this tool is to introduce more red or blue, which will balance things out.
Just follow these steps...
In the iPhone editor, scroll to the right of the icons directly below the image until you find the thermometer. Select this icon to adjust Warmth, moving the cursor to the right of the scale to introduce more red or to the left to introduce more blue. To know when you've adjusted correctly, looked to white or grey objects within the image for a sense of accuracy.
Tip 06
Grainy photo?
There's nothing worse than a grainy photo that you don't feel confident printing at scale — especially when it's a pull-at-your-heart-strings moment that deserves the full-page treatment in a photo book or a place on your walls. If you're wondering how to fix a grainy photo, this is where the Noise Reduction and Sharpness tools can come in handy. Open up your native iPhone photo editing app and say it with us now, "Grainy photos be gone!"


Just follow these steps...
Noise Reduction is one of the last tools you'll find as you scroll to the far right of the icons directly below the image, appearing as a circle half-covered in small white dots. Turning Noise Reduction up to reduce grain is step one. Now, find the Sharpness tool by locating the small, white triangle icon. Increasing the sharpness in tandem with Noise Reduction will further improve the clarity of the image.
Tip 07
Bad angle?
Taking a photo from a bad angle can make the subject feel warped, and it happens more often than we'd care to admit. Whether it's an image of a building that wasn't quite taken head-on or a group photo taken by the tallest person in the group, a slight miss in perspective can have a significant impact on how your lens captures the image. But there's an easy fix — well two to be exact — and they're among the least commonly known of the editing tools available on your iPhone. Say hello to your Horizontal and Vertical axes!

Just follow these steps...
You'll find these tools in the same menu where you found your Crop and Straighten tools, so you'll need to start by selecting the final icon at the very bottom of your screen. The Horizontal and Vertical tools will now appear in the set of icons directly below the image. Use the Horizontal tool to rotate the perspective left or right, and use the Vertical tool to rotate perspective up and down.
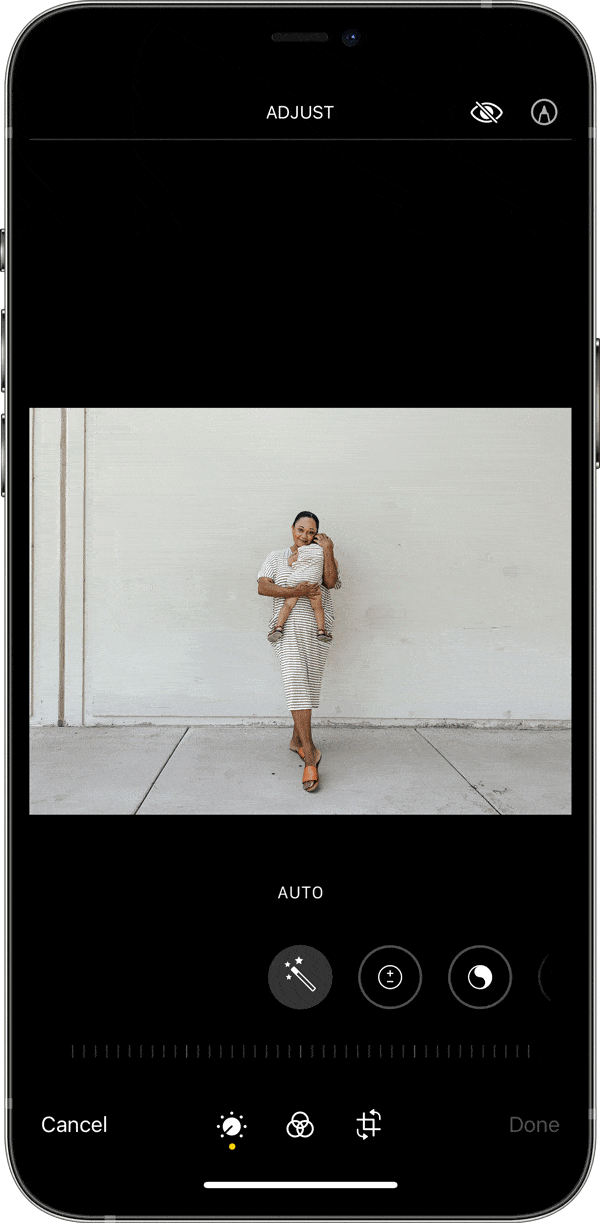
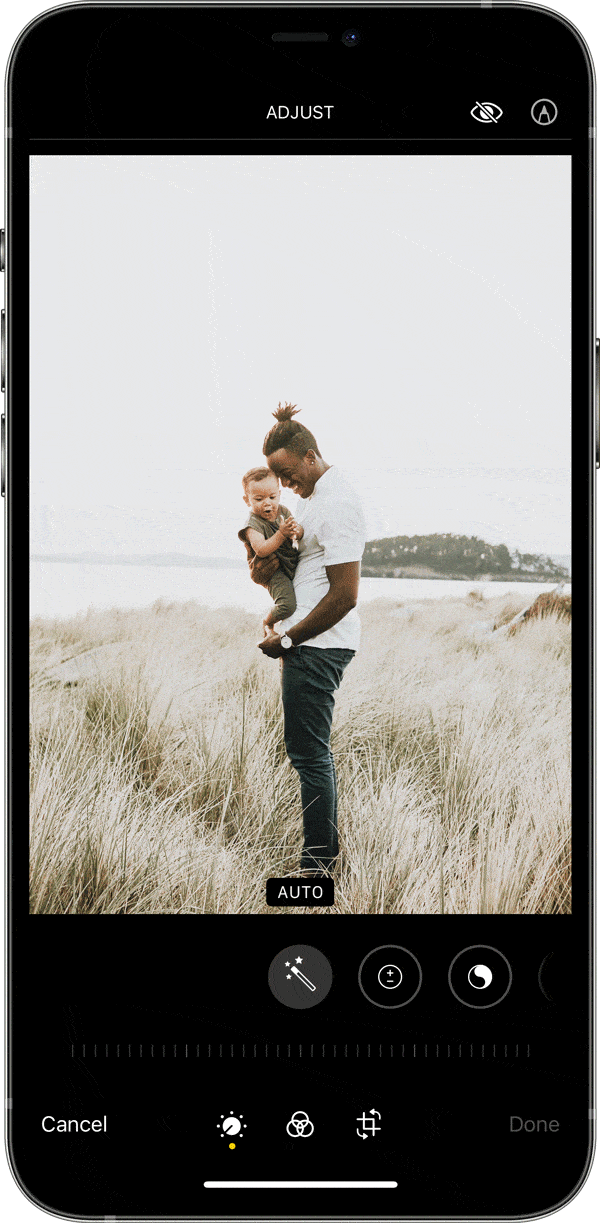
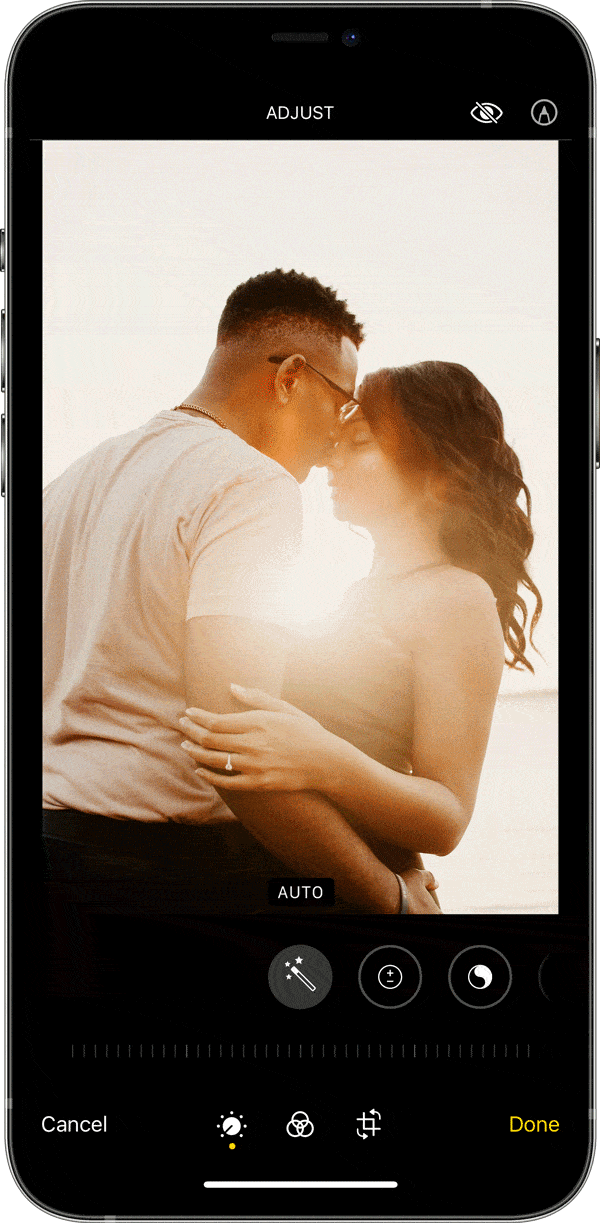
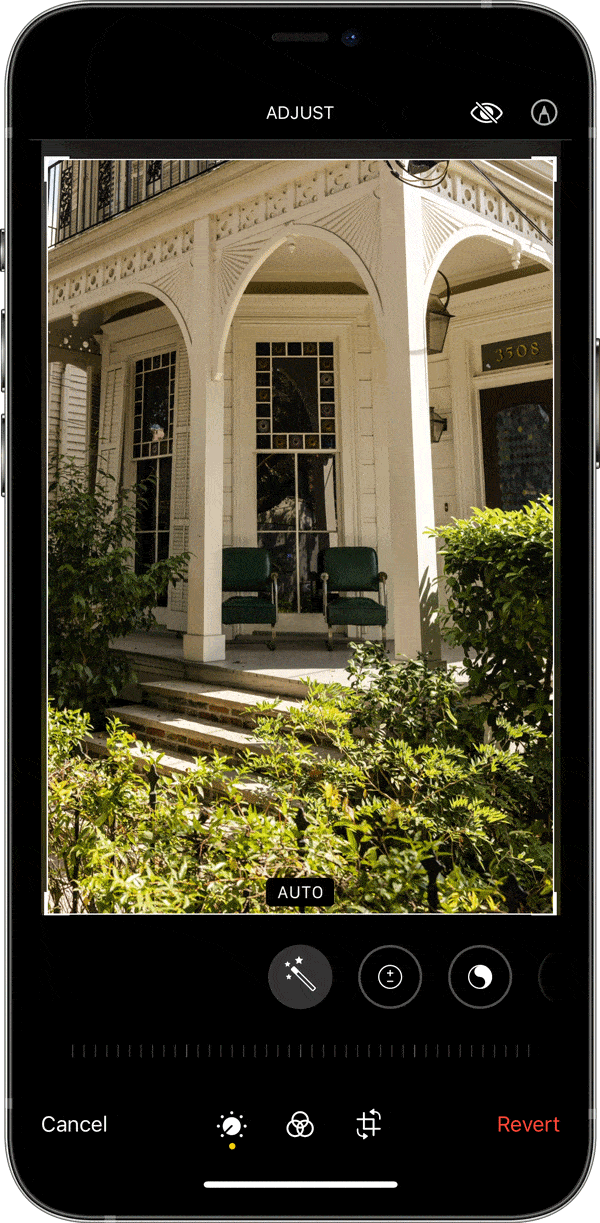
Tip 08
Not sure where to start?
Sometimes a photo can feel a little off, but it's not very clear where to start your edits. This is when the "Auto" function can be your new best friend. The great thing about this function is that it adjusts several elements, from Exposure, to Contrast, and Beyond — so you can make multiple edits in one swipe. Plus, you can see which of the elements it adjusted and how.
Just follow these steps...
As the first icon directly below the image, Auto couldn't be easier to find, and it's pre-selected when you enter the native editing app. In this case, we recommend moving the cursor around on the scale until you get a result you love.