


Tip 01
Capture Photos While Recording
The best part about taking a video? Some of the most authentic still images come from it. While taking a video, tap on the opaque circle on the bottom left of the screen. Here, you can take images while filming (the best of both worlds!). And once you’re done filming, you’ll have the entire video plus your favorite still shots filling up your camera roll.
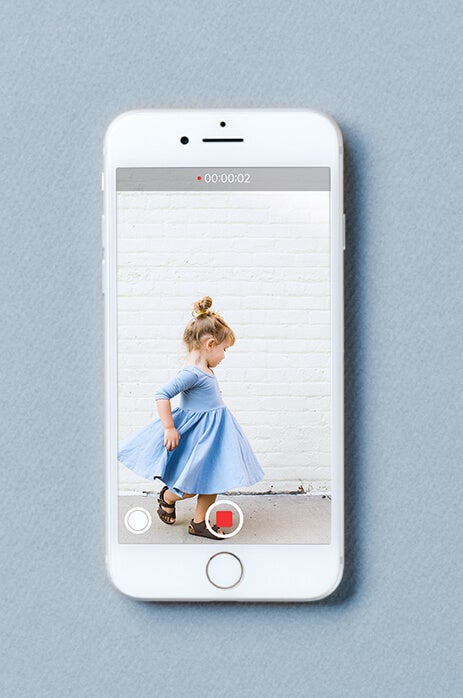
Practice on: iPhone 7+, iPhone 7, or any newer version of iPhone
Tip 02
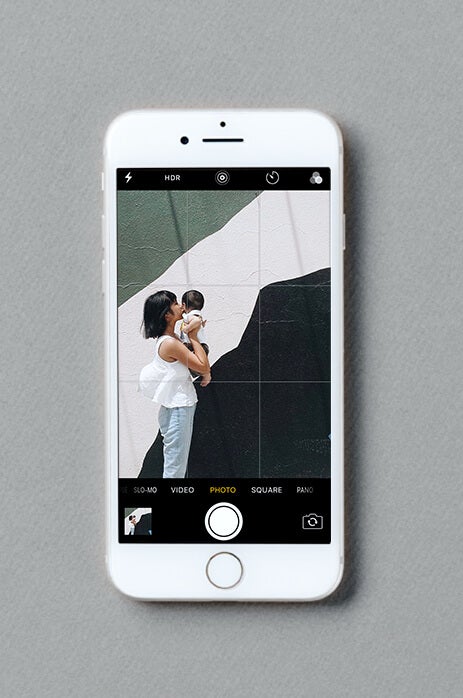
Swipe Left To Get The Shot
Whether it be your pup running across the park, a sun ray peeking through the clouds, or that split-second expression of pure joy, sometimes the most picture-perfect moments happen fast — too fast. If your phone is locked and you need to easily access the camera, simply swipe to the left on your locked screen and your camera will open immediately.
Practice on: iPhone 7+, iPhone 7, or any newer version of iPhone
Tip 03
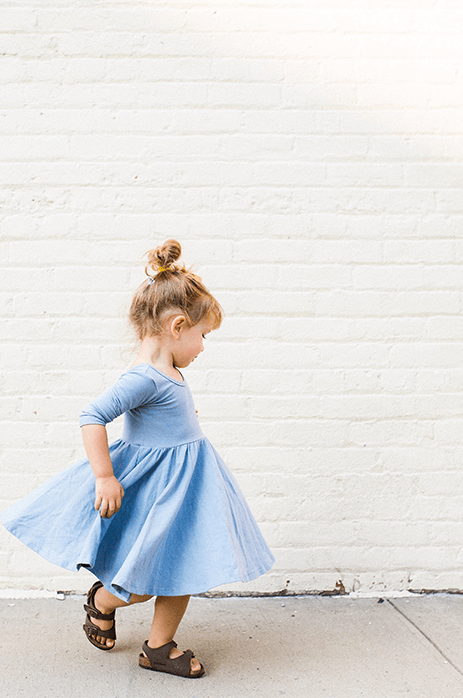
Take A Portrait With Depth Effect
By now, we’ve all seen those perfectly in-focus images that are taken on (drumroll)....an iPhone. With the ability to create depth and highlight a subject, portrait mode has quickly become one of our favorite features that will have people asking if your photo was taken on a DSLR. Pro tip: make sure to find a well lit area (think: bright and natural light) and get in close to your subject until the yellow “depth effect” button is highlighted.
.jpg)

Practice on: iPhone 7+ or an newer version of iPhone
Tip 04
Clean Your Lens For Clarity
This may seem obvious, but it's so easy to forget to clean your lens. This small act can dramatically change photos – leading to crisp images and full detail. Grab a clean microfiber cloth (or even the side of your shirt) and frequently clear off any dust or residue from the lens before your next photograph.
Practice on: Any version of iPhone
Tip 05
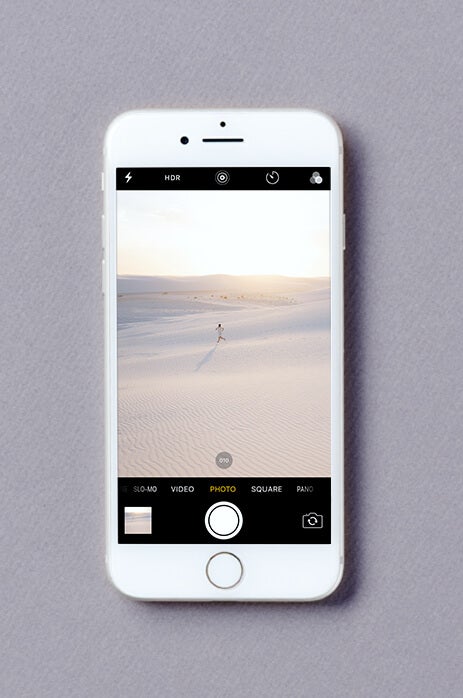
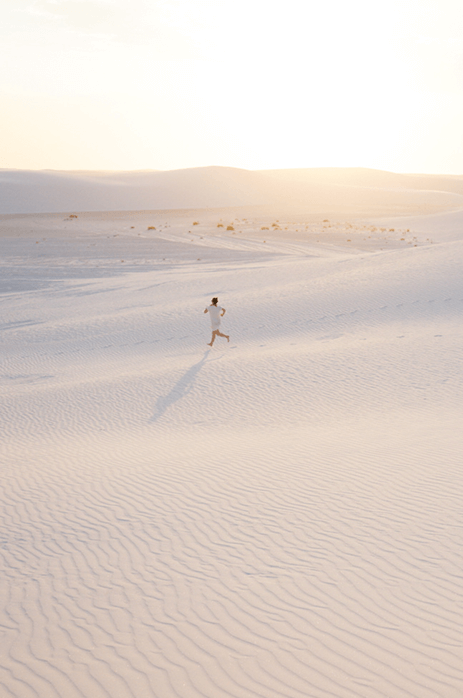
Control The Light Through Exposure
Adjusting the exposure of a photo can dramatically change the image. Tap the subject of your photo and a sun icon will appear. In the image above, we tapped the ocean and toggled the exposure up a few notches so the brightness of the ocean would match what we saw in front of our eyes. You can do the opposite by dragging the toggle down to create a darker image.

Practice on: iPhone 7+, iPhone 7, iPhone 6, or any newer version
Tip 06
Tap To Focus
We can all picture it: your friends are all lined up in excitement, waiting to take that photo together, and the camera automatically focuses right behind their faces. Been here before? Well, we’ve found that if you tap on the small box that appears on each of the faces in the photo, the camera will focus on all of the people.
Practice on: iPhone 7+, iPhone 7, iPhone 6, or any newer version
Tip 07
Catch Movement Through Burst Mode
If you see the beginnings of movement you know you need to capture, keep holding down the shutter button to take a burst of photos. You’ll get every step in sequence, which will lead to a handful of action shots to choose from. Head to your camera roll and click on what seems like just one photo. The “select” function will let you scroll through and pick your favorites — keep in mind that sometimes blurry is beautiful and the best type of movement is the one that’s most natural.
Practice on: iPhone 7+, iPhone 7, iPhone 6 , or any newer version
Tip 08
Find Light
If you’re in the dark and looking to take a photo without that bright interruption of flash, get as close as you can to a light source (could be a neon sign, dim lamp, etc.) and turn off your flash. Then, tap on your subject to lock in the exposure, and you’ll have that dim-lit photo in no time.
Practice on: iPhone 7+, iPhone 7, iPhone 6, or any newer version
Tip 09
Line It Up With The Grid
Turning the grid function on allows you to line up edges, practice the rule of thirds (see our full guide here), or take a symmetrical shot. Simply put, these four lines will help you take a more strategic photo. To add a grid to your camera view, go to settings → photos and camera → grid → toggle it on.

Practice on: iPhone 7+, iPhone 7, iPhone 6, or any newer version
Tip 10
Get In Close With Zoom
That quiet moment of stillness that you want to get up close to capture? You can easily accomplish this with the zoom feature. To do this, hold down on the photo and slide in towards the subject. Then, tap on the subject to focus. You’ll be close (and clear!) in no time. On the iPhone 7+, click the “1x circle button” to switch to the zoom lens for a sharper photograph.
Practice on: iPhone 7+, iPhone 7, iPhone 6, or any newer version

.jpg)